
Qwik is a frontend framework for creating web applications that offers lightning fast page load times, regardless of the size and complexity of your site.
In this article, we’ll learn how to get started with Qwik and explore the building blocks of a Qwik application by creating a simple example app. We’ll also review the concept of hydration, learn why it slows down our apps, and see how Qwik avoids hydration, boosting our application’s performance. Let’s get started!
Rendering in JavaScript frameworks
Before we can get started with Qwik, we first need to understand the different rendering options that are available in JavaScript frameworks.
Client-side rendering
Early JavaScript frameworks like AngularJS used client-side rendering. In client-side rendering, all logic, data fetching, routing, and templating happens on the client side. However, a significant downside of client-side rendering is that as an application grows, the time to render the initial page increases.
The concept of lazy loading was introduced to speed up the first render. With lazy loading, instead of sending your whole application to the browser at one time, you can divide your application into multiple smaller parts called chunks. When the application loads for the first time, you’ll only send and execute the required code on the client side, speeding up the first render.
Server-side rendering
In server-side rendering, your application’s first render is already done on the server side and sent to the browser as HTML, speeding up the time of the initial render significantly.
Most web apps aren’t a static webpage. Therefore, client-side frameworks must recreate the page after server-side rendering by attaching event listeners, creating a DOM tree, and restoring the application state to make it interactive. This process is called hydration. The downside of hydration is that even though the page is rendered on the user’s screen, it might not be interactive until hydration downloads and re-executes the code again.
As a framework without hydration, this is exactly the problem that Qwik tries to solve.
Getting started with Qwik
To get started, you’ll need to have Node.js ≥v16.8 installed.
Qwik comes with a CLI tool that helps you scaffold your application. First, generate your app using the following command:
npm create qwik@latestThe command above will prompt you to name the application; let’s choose dice-roller. It’ll also prompt you to select the type of application; select Basic App (QwikCity). This will generate a directory called dice-roller within a Qwik application.
Let’s navigate to the dice-roller directory using the following command:
cd dice-rollerNow, let’s start the dev server to run our app:
npm startTo see how the app looks, open http://localhost:5174.
Qwik app structure
If you open the project directory in your code editor, you’ll see the following folder structure:
├── README.md├── node_modules├── package-lock.json├── package.json├── public├── src├── tsconfig.json└── vite.config.tsThere are a few key things to understand here:
- TypeScript: By default, Qwik applications support TypeScript, as indicated by
tsconfig.json - Vite: During development, Qwik uses Vite
src: By default, thesrcdirectory is used for source codepublic: Thepublicdirectory is used for static assets
Example Qwik app: Dice roll app
For this app, we’re using QwikCity, which is a meta framework for Qwik, just like Next.js is to React. We’ll use QwikCity to provide a directory-based router and access to the tree of components. If you open src/components/routes/index.tsx, you’ll see the default route / exporting a Qwik component with some content.
Replace the content of file with the following code, which simulates a six face dice roll:
import { component$, useStore } from "@builder.io/qwik";
export const randomValue = () => Math.floor(Math.random() * 6) + 1;
export default component$(() => {  const dice = useStore({    value: 1,  });
  return (    <div>      <h2>Dice roller</h2>      <h3>Dice value: {dice.value}</h3>      <div>        <button onClick$={() => (dice.value = randomValue())}>Roll</button>      </div>    </div>  );});
If you save the file and open the browser at https://localhost:5174, you’ll see the following app:
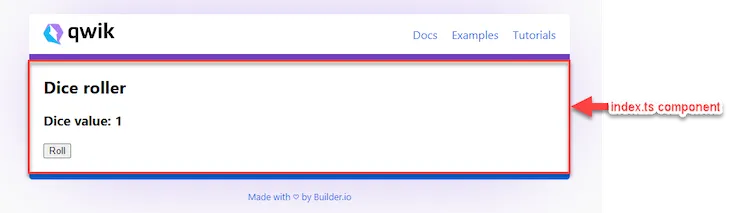
Ignore the header and footer, they’re part of default application. The code that you changed is outlined with red box. Let’s understand it in detail.
-
As the name suggests, the
component$method creates a component. Thecomponent$method comes from thebuilder.io/qwikpackage. Notice the$symbol; it has a special meaning that we’ll discuss soon. -
Again, like React, a component can have
props, which you can use to pass inputs to the component. A Qwik component usesjsx. The JSX template is returned from a component that creates the UI. -
The useStore is a Qwik Hook that allows you to create a state like React’s
useState. Whenever an app reads or write these values, Qwik is aware of it, re-rendering the UI accordingly. -
The onClick$ is an attribute that allows you to bind a click event handler on an element. You can create event handlers for various types of events. Finally, the
randomValuemethod generates a random value between one and six.
In summary, in Qwik, you have components, JSX, Hooks, and events, like React. However, there is a significant difference compared to React, and that’s how Qwik avoids hydration.
The dollar sign $
Qwik comes with an optimizer, which is responsible for extracting code for lazy loading. This optimizer goes through the app code, and when it encounters the dollar sign, it creates what is called a symbol. These symbols can then be easily lazy loaded.
In the component example above, you have two places where $ exists; first at component$, and second in onClick$.
Qwik will generate symbols for the following:
- For component
- For
onClickevent handler
The $ sign is also a signal to the developer that the code has a special meaning.
HTML
After the code is rendered on the server-side, Qwik will generate HTML and send it to the browser. The markup will look like the following:
<html> <body q:base="/build/"> <!--qv q:id=0 q:key=Ncbm:0t_0--> <div> <h2>Dice roller</h2> <h3> Dice value: <!--t=1-->1<!----> </h3> <div> <button on:click="app_component_div_div_button_onclick_yuuzzqjuatw.js#app_component_div_div_button_onClick_YuUzZQjuATw[0]" q:id="2" > Roll </button> </div> </div> <!--/qv--> <script> /*Qwikloader script*/ </script> <script type="qwik/json"> {...json...} </script> </body></html>You might notice that there are no JavaScript event handlers on the HTML elements. That’s one reason why Qwik is fast when it comes to the first-render. No JavaScript means no hydration. Now, how does interactivity work?
Qwikloader
Looking at the <button> element, you’ll notice that it has a weird attribute, on:click. The browser will ignore this attribute on its own. However, Qwik utilizes this attribute using Qwikloader, a small JavaScript code delivered as an inlined <script> tag.
This attribute has a strange-looking value:
app_component_div_div_button_onclick_yuuzzqjuatw.js#app_component_div_div_button_onClick_YuUzZQjuATw[0]This strange value is called QRL, or a Qwik URL. This URL provides the following information:
- The JavaScript chunk to lazy-load
- The name of the symbol to get from the chunk
Using this URL, Qwikloader will know what code to fetch and execute from the chunk generated by the optimizer. But what about the state? How does the newly fetched code know the current state of the application?
State
Qwik also saves the state of application in serialized form using a <script> tag in the HTML. It looks something like the following:
<script type="qwik/json">{ "refs": { "8": "0!" }, "ctx": {}, "objs": [ { "value": "1" }, 1 ], "subs": [ [ "2 #6 0 #7 data" ] ] }</script>Qwik uses the serialized state for the following reasons:
- To restart the execution on the client-side after it’s paused on the server
- To create subscriptions on the client-side to re-render only the component that changed
This ability to resume the application using lazy-loading and access serialized state without downloading all the application code is known as resumability.
Deploying
Once you finish your application, you can deploy it to any environment where Node.js is available. Qwik provides built-in to integrations that allow you to quickly deploy to hosting services like Netlify, Vercel, and more.
You can add any integration by running the following command:
npm run qwik addAt the time of writing, Qwik supports the following integrations:
For instance, if you want to deploy on Netlify, you can run the following command:
npm run qwik add netlify-edgeThen, you can run the following commands to deploy your application to Netlify:
npm run buildnpm run deployConclusion
In this article, we covered various rendering techniques, some of the key APIs of Qwik like component, hooks, events.
Then, we learned how Qwik makes applications resumable using Optimizer, Qwikloader, and QRL. This is just tip of the iceberg. To learn more, go to https://qwik.builder.io to learn more about QwikCity, Builder, Partytown and so on.